

Store a credential
- In the app
- With code
1
Open Credentials
Click Credentials in the left sidebar. Its sub-items open the Passwords, Credit Cards, Secrets, 2FA and Magic Links tabs.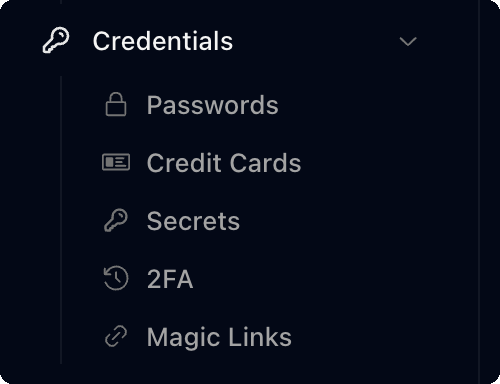
2
Click Add
Choose Password, Credit Card or Secret.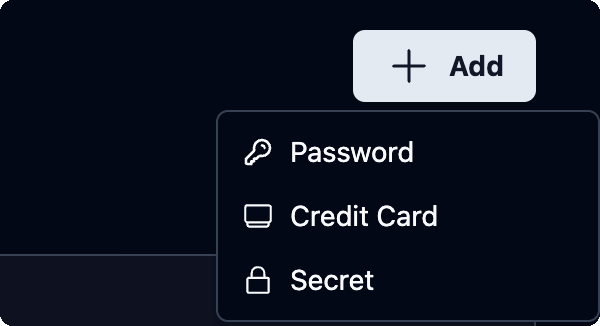
3
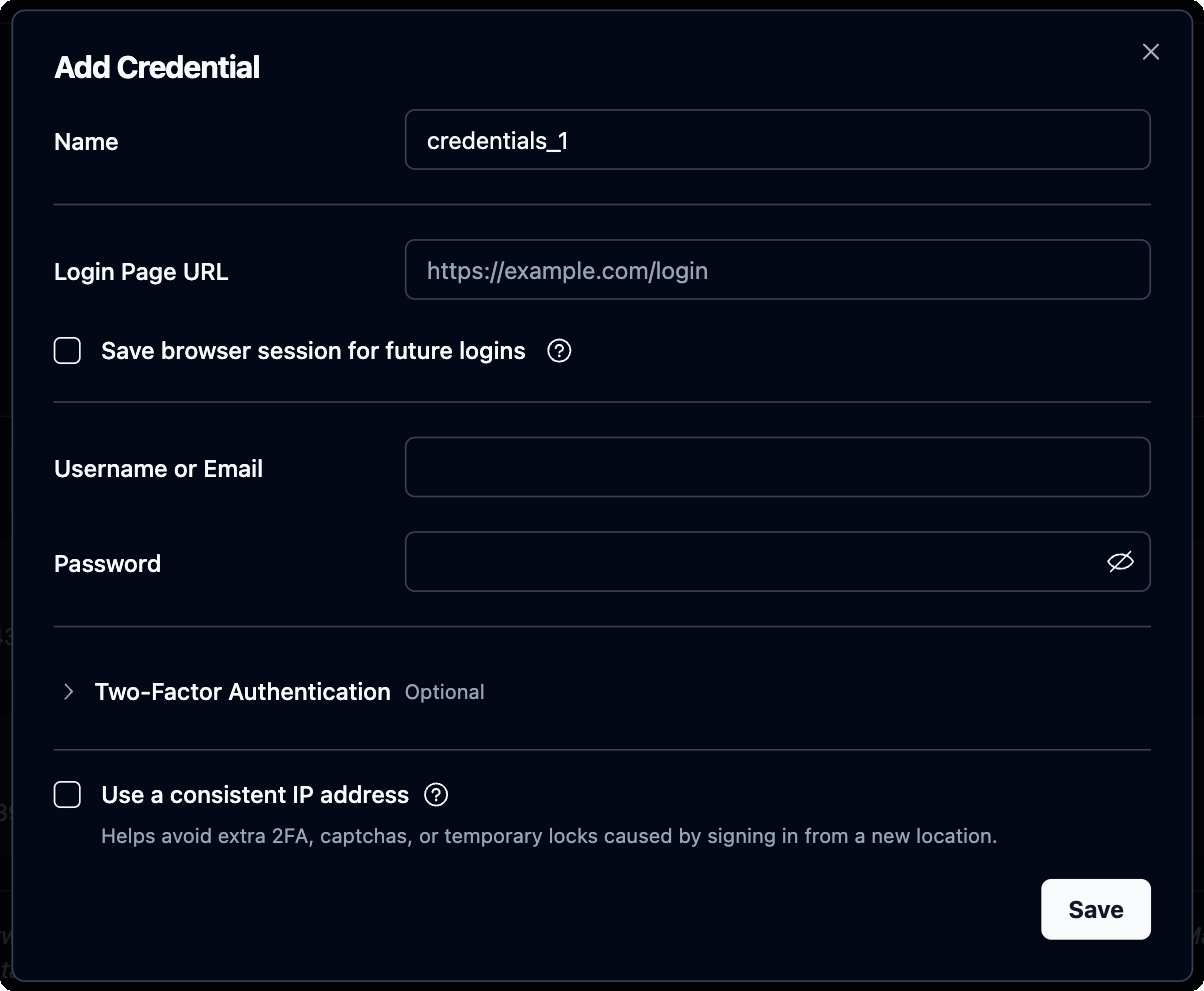
Fill in the form and click Save
The credential is available to agents right away.
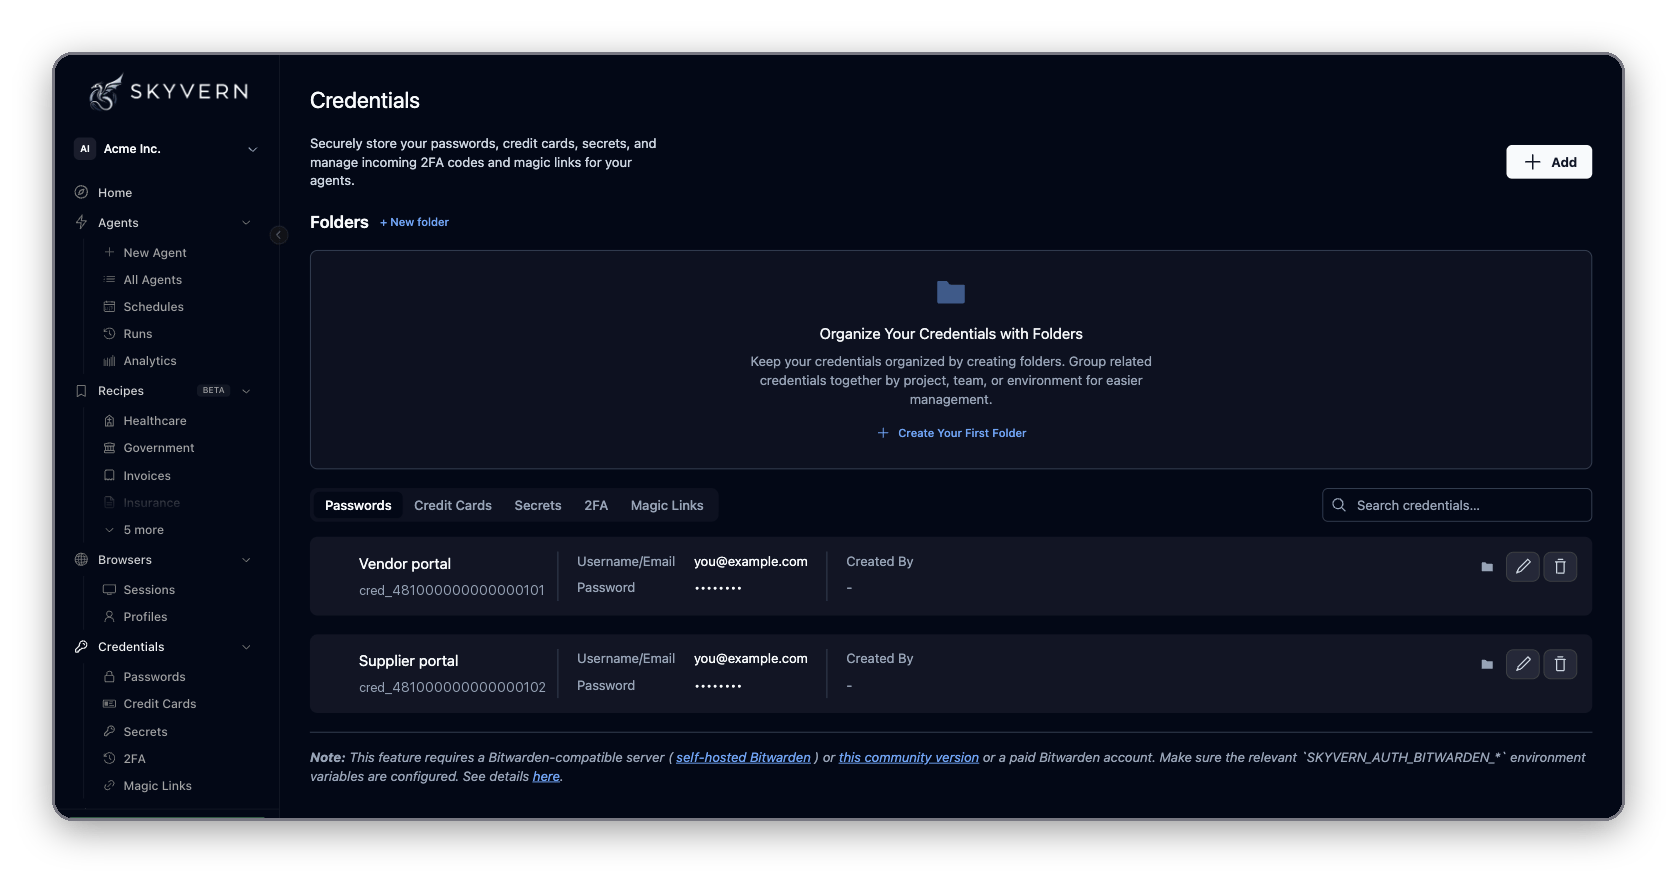
- Name: a label you will recognize, such as “Vendor portal”.
- Login Page URL: where the sign-in form lives.
- Username or Email and Password.
- Save browser session for future logins: Skyvern signs in once, checks it worked, and saves the signed-in browser so later runs skip the login form. Needs the Login Page URL. You can add Login instructions (optional), such as “Click the SSO button first”.
- Two-Factor Authentication: see Two-factor authentication.
- Use a consistent IP address: signs in from the same residential IP each time, which avoids extra 2FA prompts, captchas and lockouts caused by a new location.
MM/YY) and CVV. Billing Details (address, Billing Email, Billing Phone) are optional; fill them in when checkout pages ask for a billing address. After you save, only the last four digits are shown.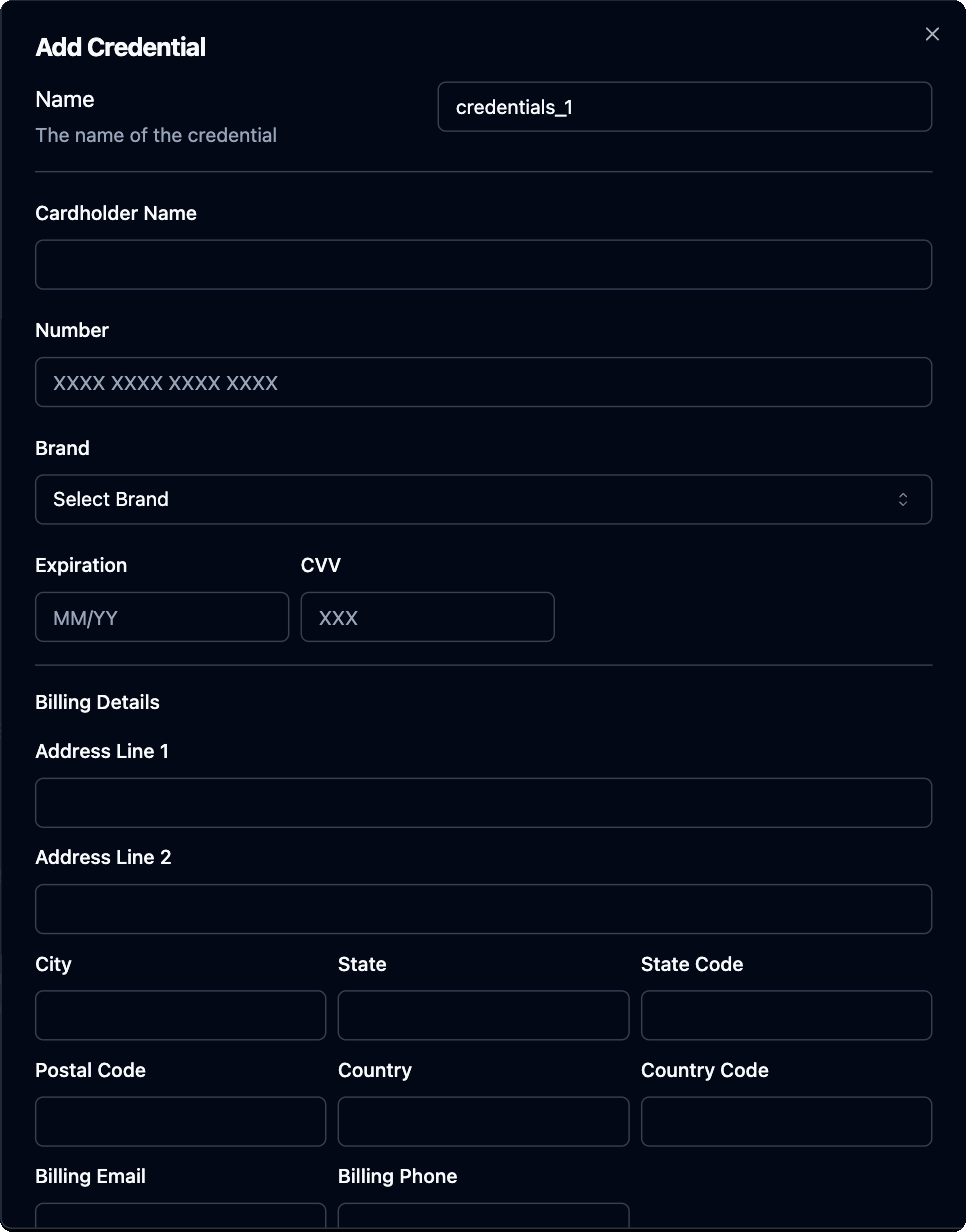
Use a credential in an agent
- In the app
- With code
- Login block: in Studio, add a Login block and pick a saved login in its Credential field. Skyvern enters the username, password and 2FA code.
- Credential input: to choose the account per run, open Inputs, click Add Input and set the value type to credential. Pick the credential type (Password, Secret or Credit Card) and the source (Skyvern, or a connected vault). Whoever runs the agent picks the credential from a dropdown.
- Credit cards need no field mapping. A Browser Task or Browser Action block on a checkout page fills the card number, name, expiration and CVV from the credential input.
- Secrets go where a block takes text, such as an HTTP Request or Code block. Reference the input’s key:
{{ my_secret.secret_value }}.
Use your own vault
If your team already keeps logins in a vault, connect it and Skyvern reads items at run time. On Integrations, connect one of the Credentials tiles:
Then add a credential input and choose the vault as its source. The input asks for the item to use: a Bitwarden collection ID and item ID (or a URL parameter key to match by site), a 1Password vault ID and item ID, or an Azure vault name with the names of the secrets that hold the username, password and optional authenticator key. Items from connected 1Password and Bitwarden vaults also show on the Passwords tab.
1Password does not expose a card’s native expiration field. For credit cards stored in 1Password, add a text field named Expire Date, Expiry Date or Expiration Date in
MM/YYYY or MM/YY format.Custom Credential Service: the API your service implements
Custom Credential Service: the API your service implements
With a custom service connected, the Add dialog shows Store in Custom Credential Service. Skyvern then calls your API with
Authorization: Bearer <API Token>:Self-hosted Skyvern reads the same settings from
CREDENTIAL_VAULT_TYPE=custom, CUSTOM_CREDENTIAL_API_BASE_URL and CUSTOM_CREDENTIAL_API_TOKEN. The other vaults (CREDENTIAL_VAULT_TYPE values skyvern, bitwarden, azure_vault, gcp), including a self-hosted Bitwarden or Vaultwarden setup, are in the configuration reference.Two-factor authentication
Set 2FA up on the password credential itself: expand Two-Factor Authentication in the Add or Edit dialog and pick how the site sends codes.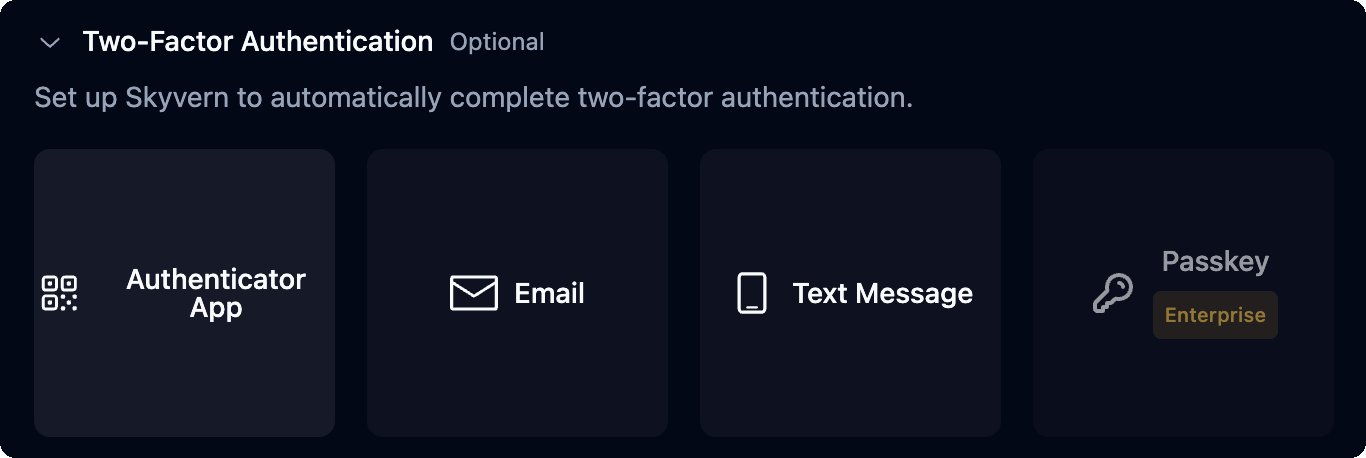
Authenticator app
- In the app
- With code
- Choose Authenticator App.
- Pick the app the site uses: Google Authenticator, Microsoft Authenticator, Okta Verify or Oracle Mobile Authenticator. Google Authenticator covers any standard authenticator setup code.
- Paste the key into Authenticator Key, or click Scan QR and upload a screenshot of the site’s QR code.
- Click Save.
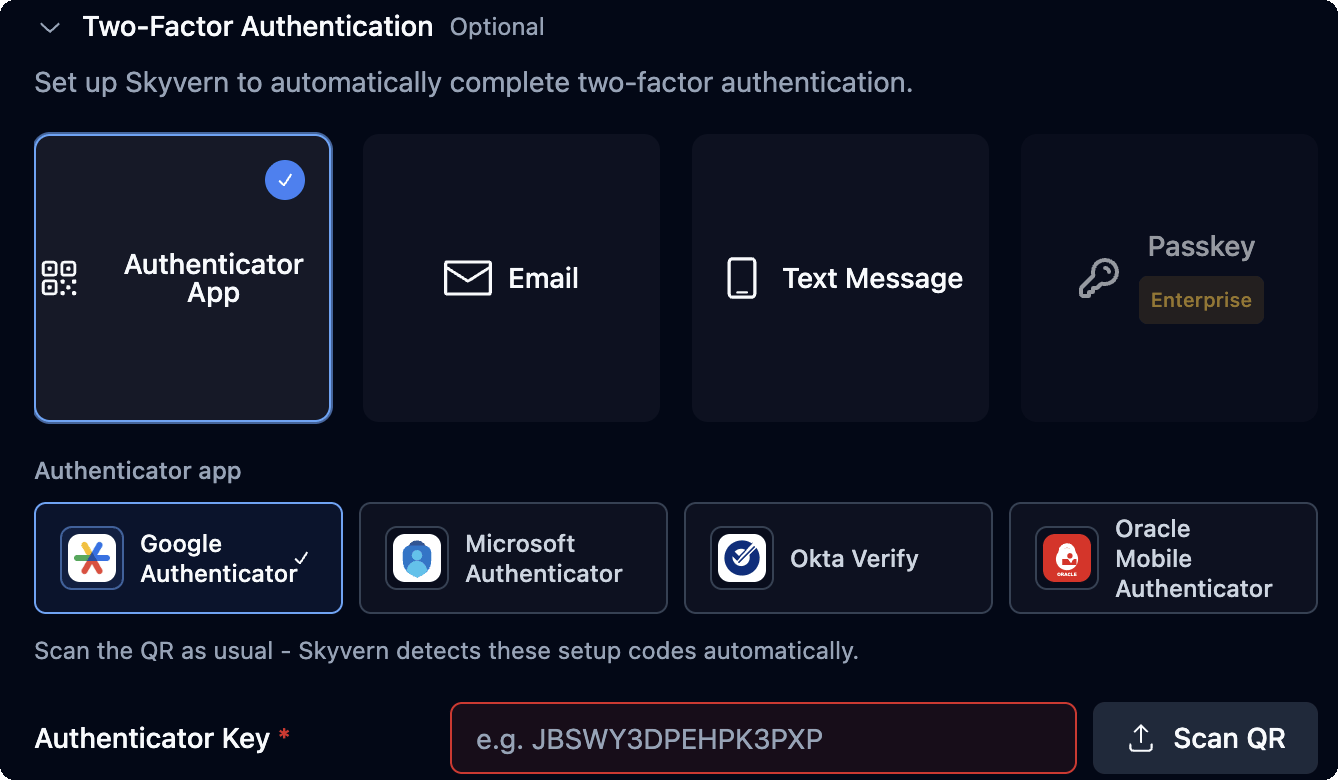
JBSWY3DPEHPK3PXP. Password managers that store 2FA keys show it on the login item. If 2FA is already on and you never saved the key, turn 2FA off and on again on the site to get a new one.
Email and text message codes
- Choose Email or Text Message.
- Fill in the identifier: the address or phone number that receives codes. For Email, the TOTP Identifier (Username or Email) field lists your connected inboxes under Select a connected account. Click the code icon above it (Enter manually) to type an address instead. For Text Message, enter the number in TOTP Identifier (Phone).
- Click Save.
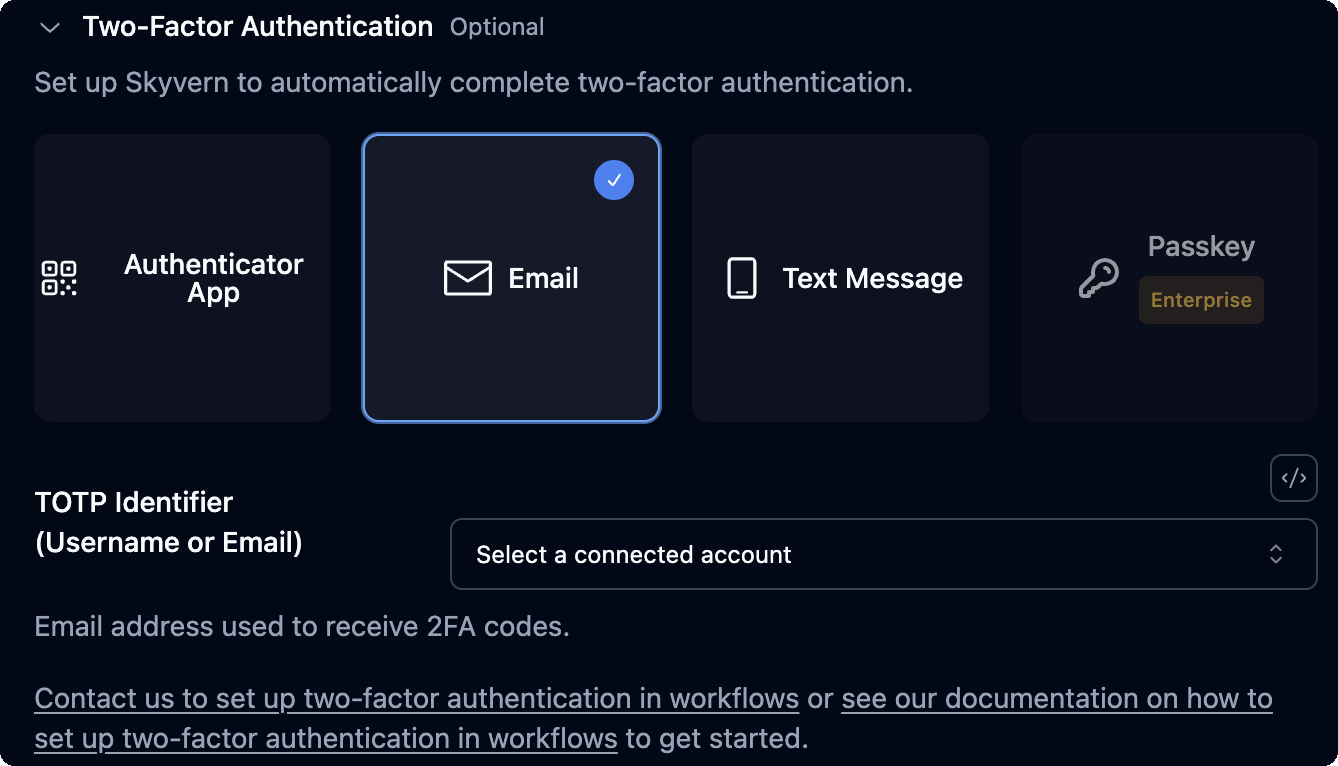
totp_identifier to login, run_task or run_workflow. In Studio, blocks that sign in have a 2FA Identifier field.
Connect an inbox
On the 2FA or Magic Links tab, click Connect an inbox. It opens Integrations, where you connect Gmail or Outlook. Skyvern then finds verification codes and magic links in that inbox on its own, with no forwarding.Push a code
Without a connected inbox, deliver email and SMS codes yourself.- In the app
- With code
While a run waits for a code, its page shows a “needs 2FA” banner with a countdown. Click Enter Code and paste the message.Or open the 2FA tab on the Credentials page and use Push a 2FA Code: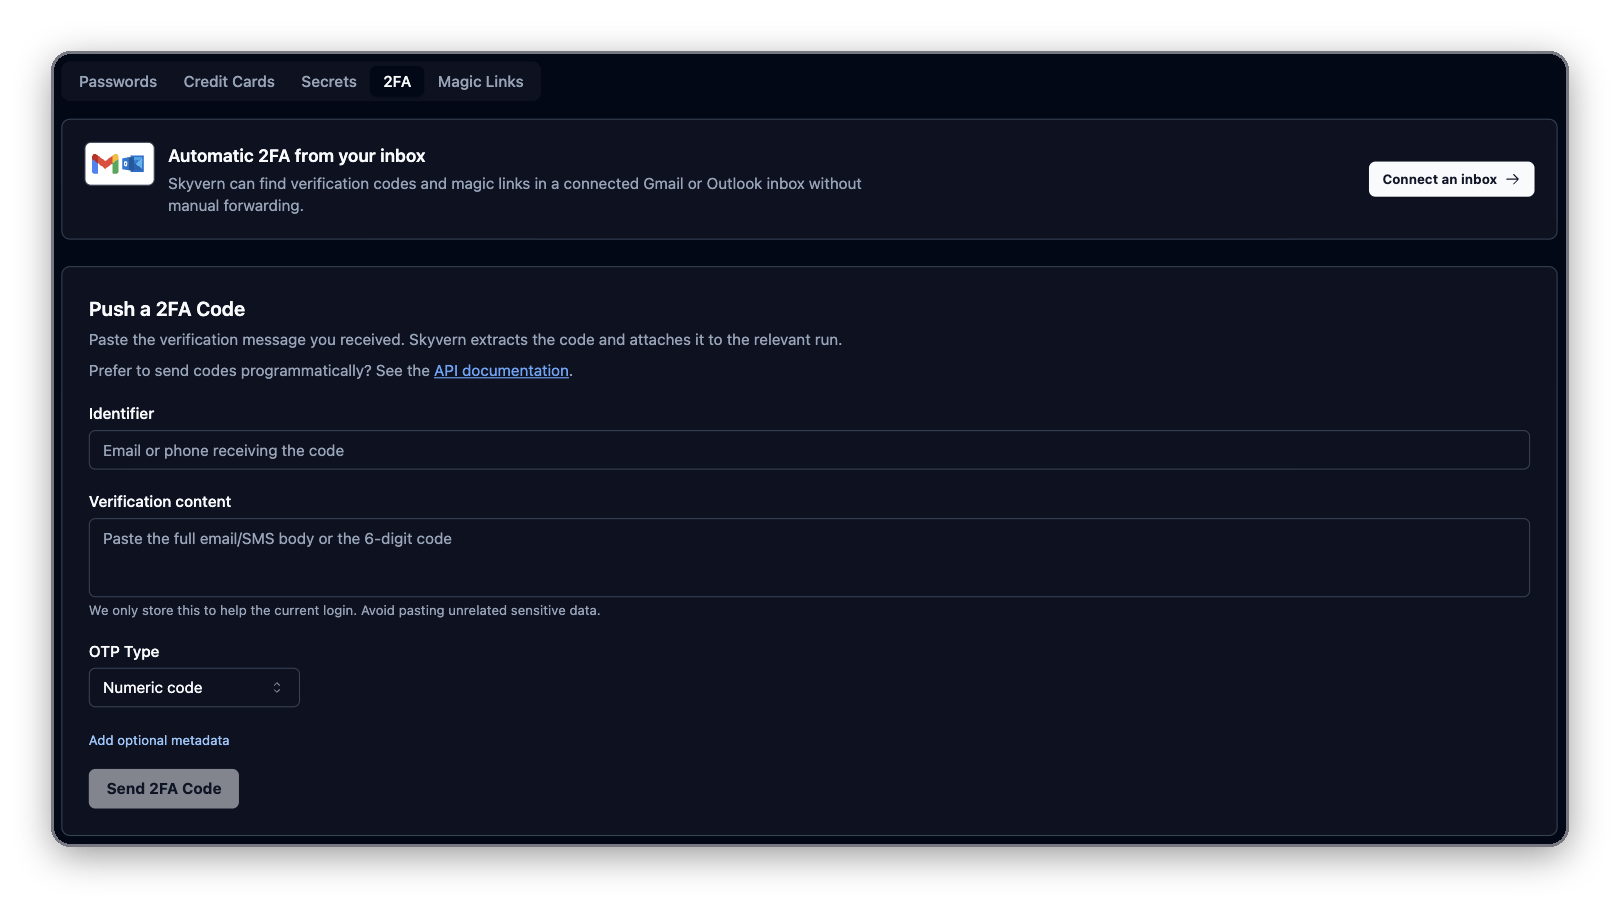
- Identifier: the email or phone that received the code.
- Verification content: the whole message, or just the code. Skyvern extracts the code.
- OTP Type: Numeric code, or Magic link for a one-time sign-in link.
- Add optional metadata: when several runs wait on the same identifier, add the Agent run ID, Agent ID or Task ID to target one.
Let Skyvern fetch codes from your endpoint
If codes land in a system you control, give Skyvern a URL to ask instead. Skyvern sends aPOST with task_id, plus workflow_run_id and workflow_permanent_id for agent runs, signed with the x-skyvern-signature header (see Going to production to verify it).
Answer with HTTP 200 and JSON:
{"verification_code": ""}. Any other status, or a body that isn’t a JSON object, counts as an error. If the wait runs out, the run fails with OTP_TIMEOUT and its failure reason lists the status codes your endpoint returned.
Where to set the URL:
- One-off login or task: pass
totp_url. - Agent: set 2FA Verification URL on the block that signs in. The run-level
totp_urldoes not fill in a block whose field is empty. For a URL that changes per run, add an input such astotp_url, set the block field to{{ totp_url }}and pass the URL inparameters.
Magic links
Some sites email a one-time sign-in link instead of a code. With a connected inbox, Skyvern finds and opens the link. Otherwise paste the message into Push a Magic Link on the Magic Links tab, or push it withsend_totp_code. Skyvern attaches the link to the waiting run and opens it.
Passkey
Passkey appears as a 2FA option marked Enterprise. See https://www.skyvern.com/pricing for plans. Passkey credentials can’t use Save browser session for future logins.Timing
- Skyvern checks for pushed or fetched codes every 10 seconds, for up to 15 minutes.
- A pushed code stays usable for 10 minutes. The site’s own code may expire sooner.
- Authenticator codes rotate every 30 seconds. When a code is split across several boxes (one digit per box), or the run uses the
skyvern-3.0engine, Skyvern waits for a fresh code if fewer than 20 seconds remain, so the code doesn’t expire mid-entry.
Troubleshoot logins
For problems that aren’t specific to credentials, see Troubleshooting.
Next
- Browsers: sessions and profiles: keep a signed-in browser and reuse it.
- Build in Studio: add a Login block and credential inputs.
- Integrations: connect inboxes and vaults.