

wr_, opens in Studio at /runs/<run id>, and is kept in Runs with its recording, screenshots and outputs.
Run an agent
1
Open the run form
In Studio, click Run in the top bar. From Agents → All Agents, click the play button (Create New Run) on the agent’s row. Both open the run form at
/agents/<agent id>/run.2
Fill in the inputs
Enter a value for each of the agent’s inputs. Inputs with a default are prefilled. If the agent has a Login block, a Login credentials section asks which saved credential to use.
3
Click Run agent
The run starts and Studio opens on it, with the Browser and Run panes.
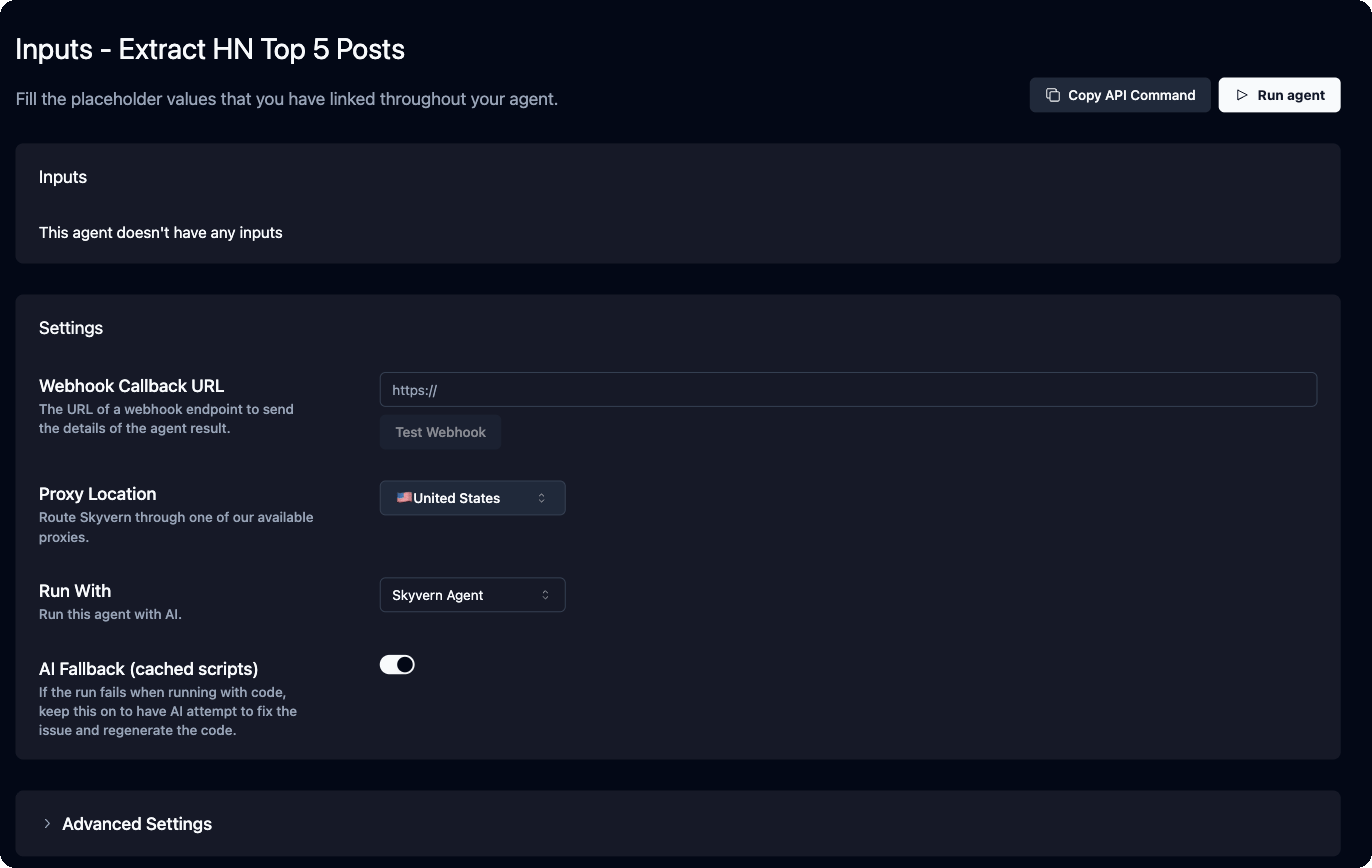
Advanced Settings holds browser options: Browser Type, Browser Session ID (run in an open session), Reuse browser session, Browser Profile (start with saved cookies and logins), Browser Address (connect to your own browser over CDP), Extra HTTP Headers, CDP Connect Headers and Max Screenshot Scrolls. Browsers explains sessions and profiles.
Copy API Command copies the same run as a cURL or PowerShell command, with your inputs and settings filled in. Use it to trigger the agent from a script. The code quickstart covers the SDKs.
Run is disabled while the agent has no blocks. Add one, or ask Copilot to build the agent first.
Watch a run live
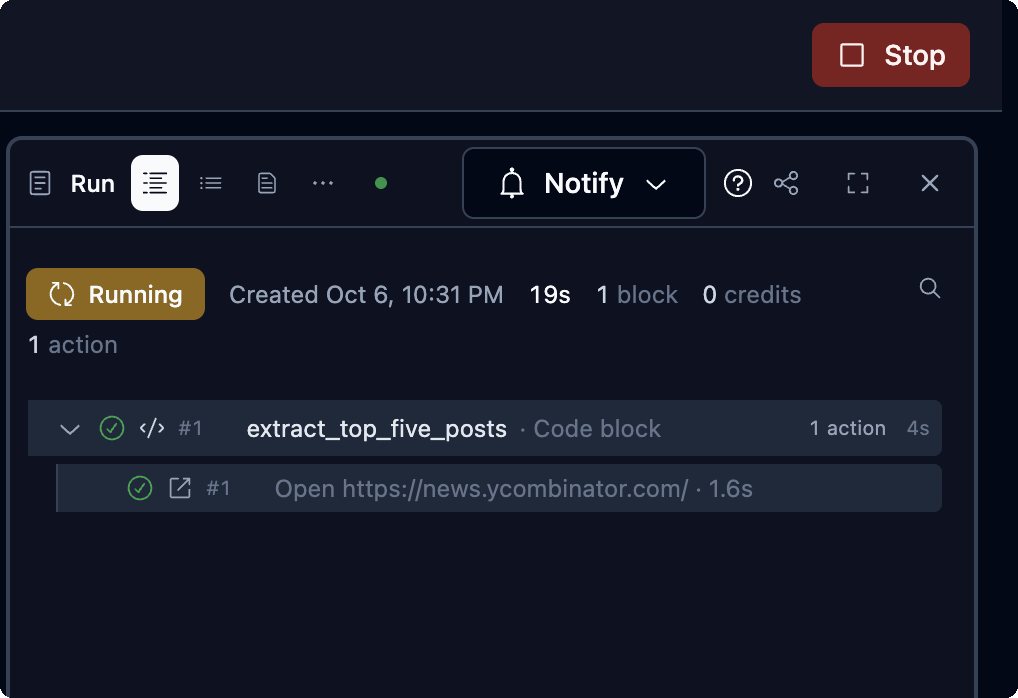
The Browser pane shows the browser the agent drives. Its header switches between three views:- Live: the browser right now, while the run is in progress.
- Recording: the video of the run, available once it has recorded.
- Screenshots: the screenshots Skyvern took at each step.
Take control of the browser
Click Take control in the live view to use the mouse and keyboard in the browser yourself. A You’re in control bar shows while you have it. Use it to solve a CAPTCHA, get past an unusual login, or close a pop-up the agent is stuck on. Click Stop controlling to hand the browser back.Stop a run
Click Stop in the top bar, then Stop run to confirm. The run ends with statuscanceled.
Read a run
The Run pane has three views, plus more under ⋯: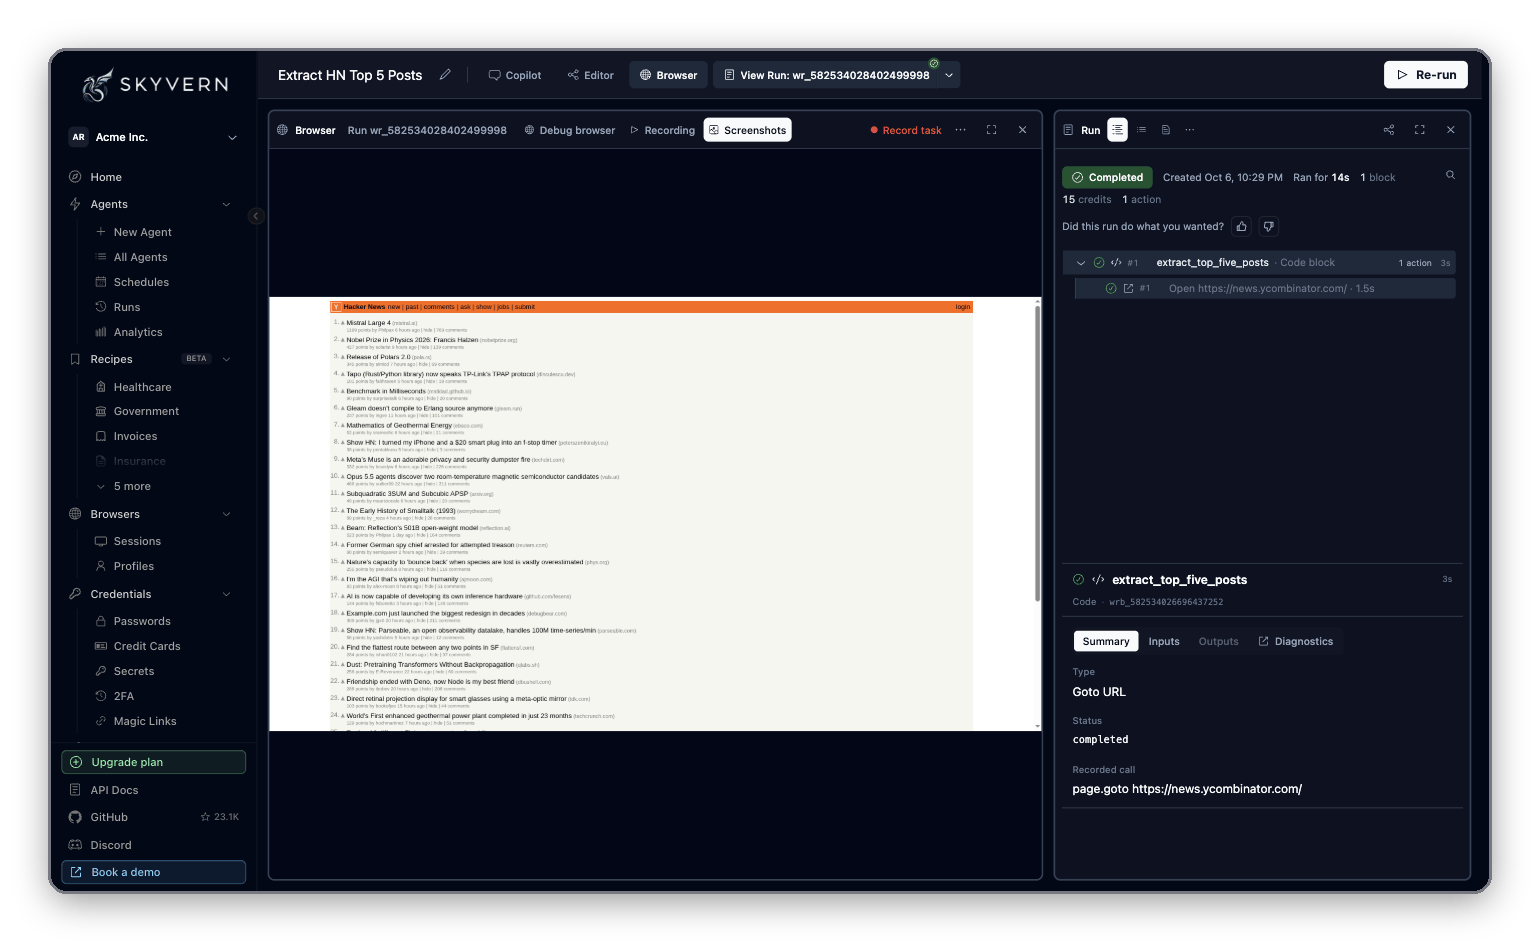
Re-run
After a run ends, the top bar’s Run button reads Re-run. It opens the run form prefilled with that run’s inputs, so you can change a value and run again.Run statuses
A block that never ran because an earlier branch or condition skipped it shows
skipped.
Download recordings, screenshots and files
To pull artifacts from code, call
GET /v1/runs/{run_id}/artifacts. Each artifact comes with a signed_url you can download from. Filter with artifact_type, for example recording or screenshot_final:
Find past runs
Click Runs in the sidebar to open Run History, every run in your organization, newest first.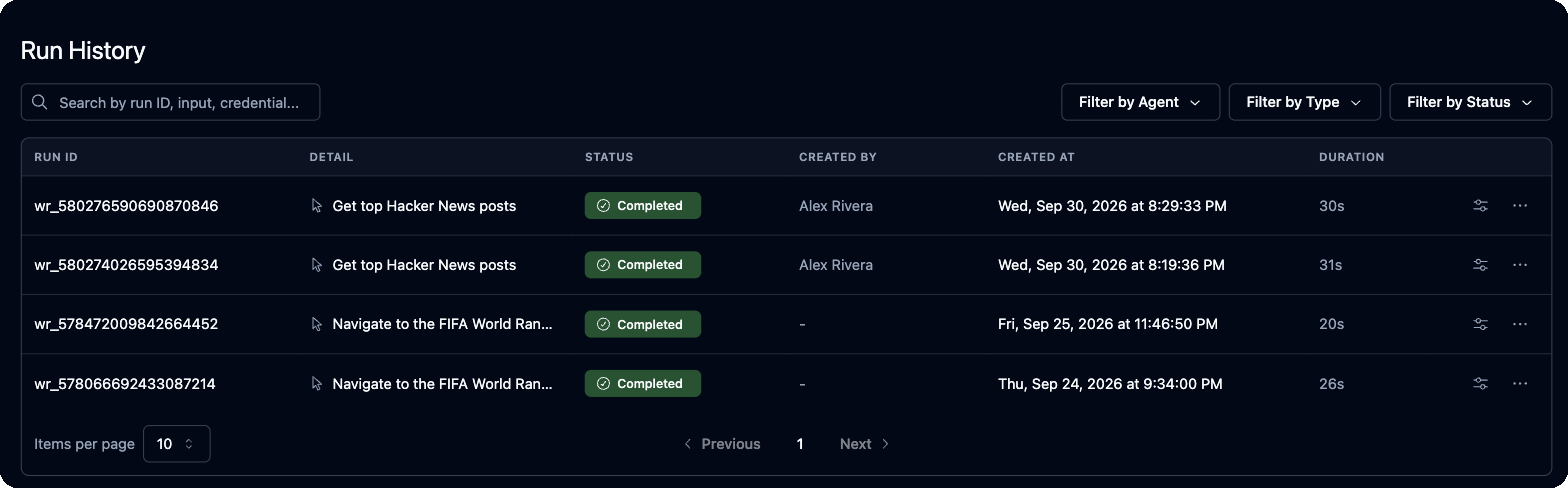
- Search by run ID, input value or credential (“Search by run ID, input, credential…”).
- Filter by agent, by run type (Task, Workflow, Agent (CUA)) and by status.
- Columns are Run ID, Detail, Status, Created At and Duration (some organizations also see Created By). Runs started by a schedule carry a badge next to the ID, and runs that used generated code show a lightning icon.
- Click a run to open it in Studio.
Schedule an agent
A schedule runs an agent automatically on a repeating timetable. New schedules are Active and fire at the next scheduled time.- From the Schedules page
- From Studio
1
Open Schedules
Click Agents → Schedules in the sidebar, then Create Schedule.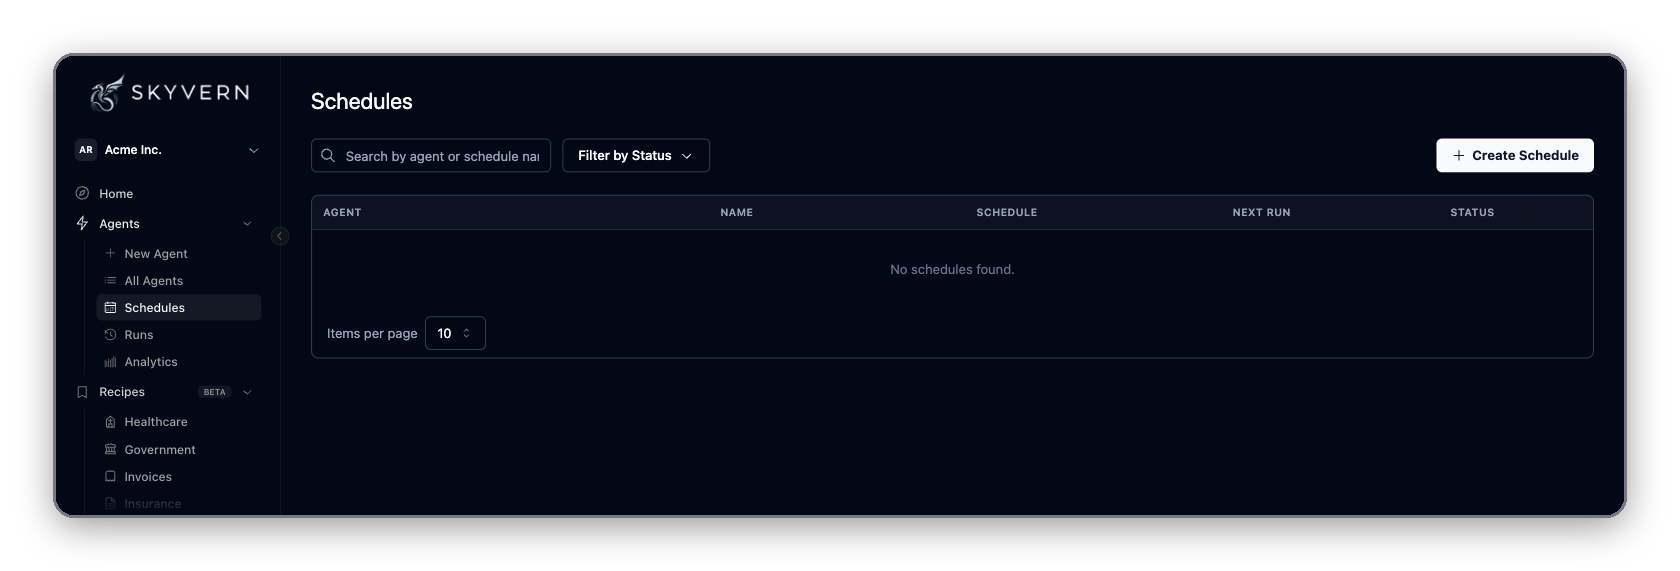
2
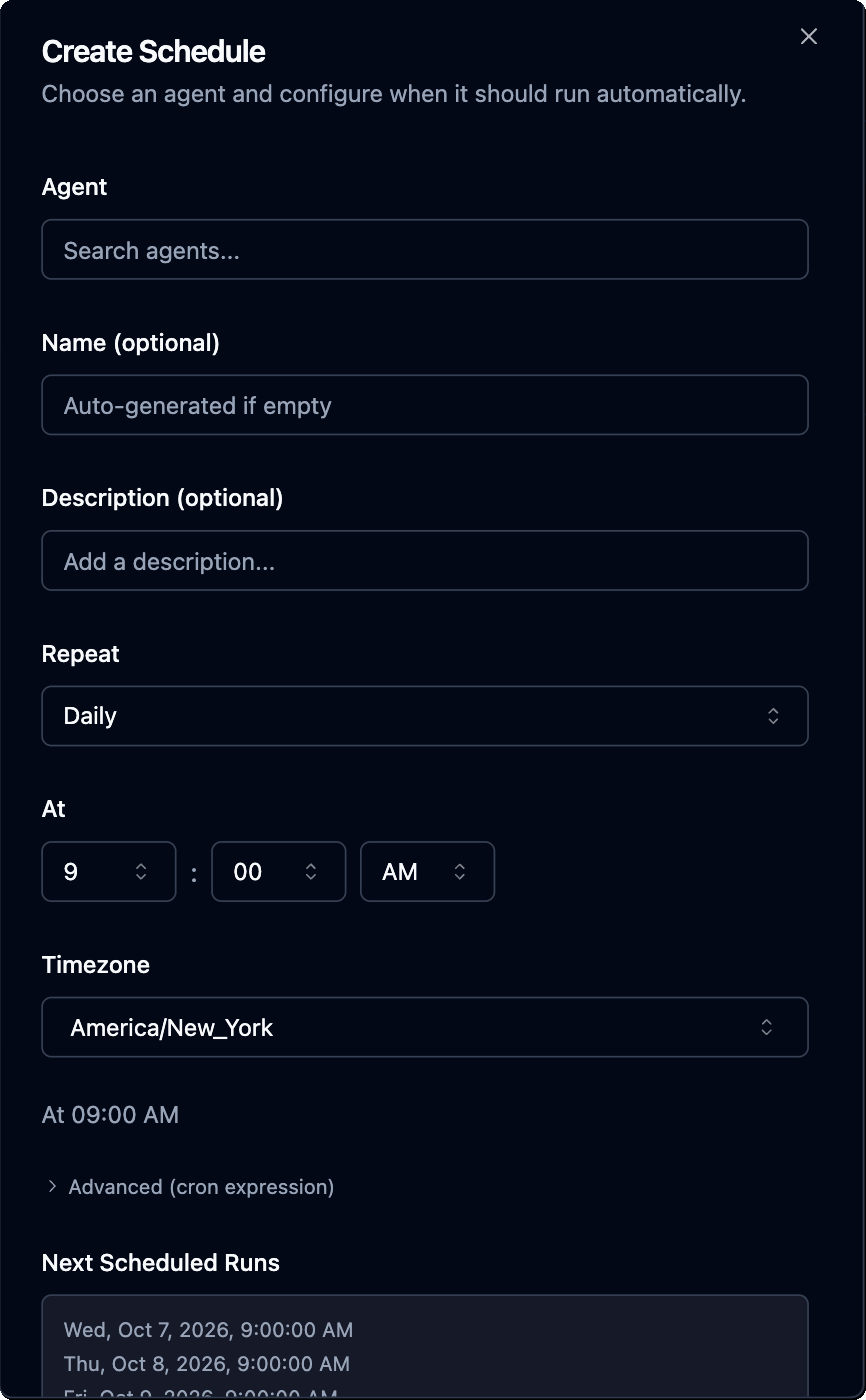
Pick the agent
Search for it in Agent. Only saved agents appear.
3
Set the timetable
Fill in the fields below, and check Next Scheduled Runs to confirm the times.
4
Create
Click Create Schedule.
Manage schedules
Schedules lists every schedule in your organization with Agent, Name, Schedule, Next Run and Status (Active or Paused). Search by agent or schedule name, or use Filter by Status. Each row’s menu can Pause, Activate, Duplicate or Delete the schedule. Click a schedule to open its page at/schedules/<agent id>/<schedule id>:
- The switch in the page header pauses or resumes the schedule, and the trash icon deletes it.
- Schedule Configuration: frequency, timezone and cron. Click Edit to change the timetable, name or description.
- Agent Inputs: the values the schedule passes, or the defaults it falls back on.
- Details: Created and Last Modified.
- Upcoming Runs: the next times it will fire.
Next
- Build in Studio: change the agent between runs.
- Browsers: run inside a persistent session or with a saved profile.
- Going to production: webhooks, retries and running agents at volume.