

/agents/<agent id>/studio.
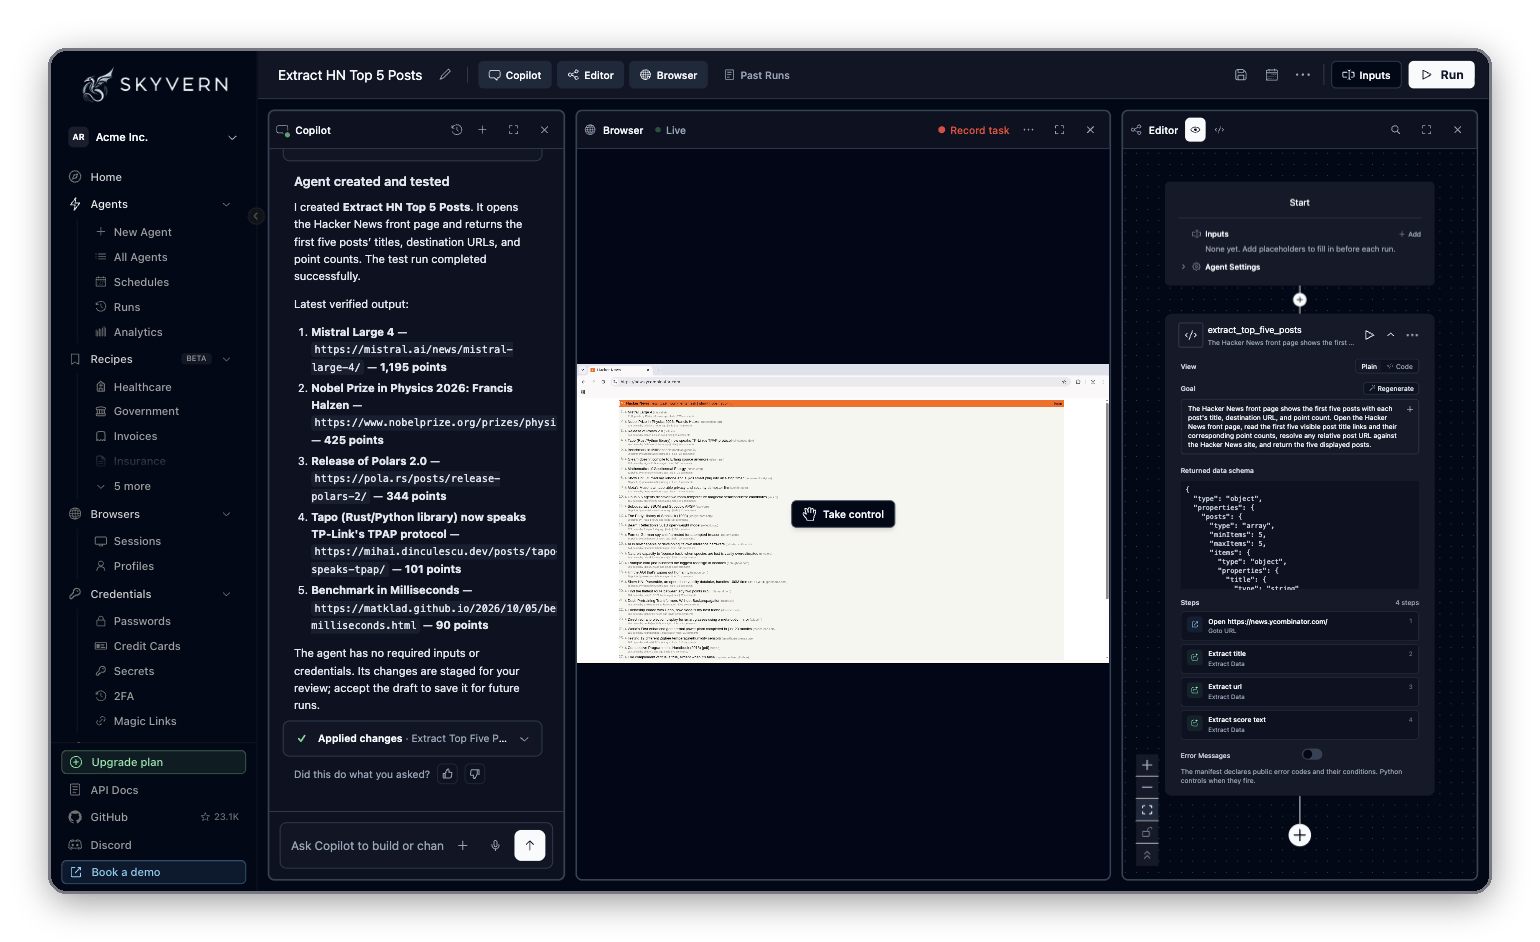
The layout
Studio has four panes. Toggle each one from the center of the top bar. You can open several side by side.
The right side of the top bar holds the agent’s controls:
Click the agent’s title at the top left to rename it. Take a tour (or Shift+?) walks you through Studio in the app.
Build with Copilot
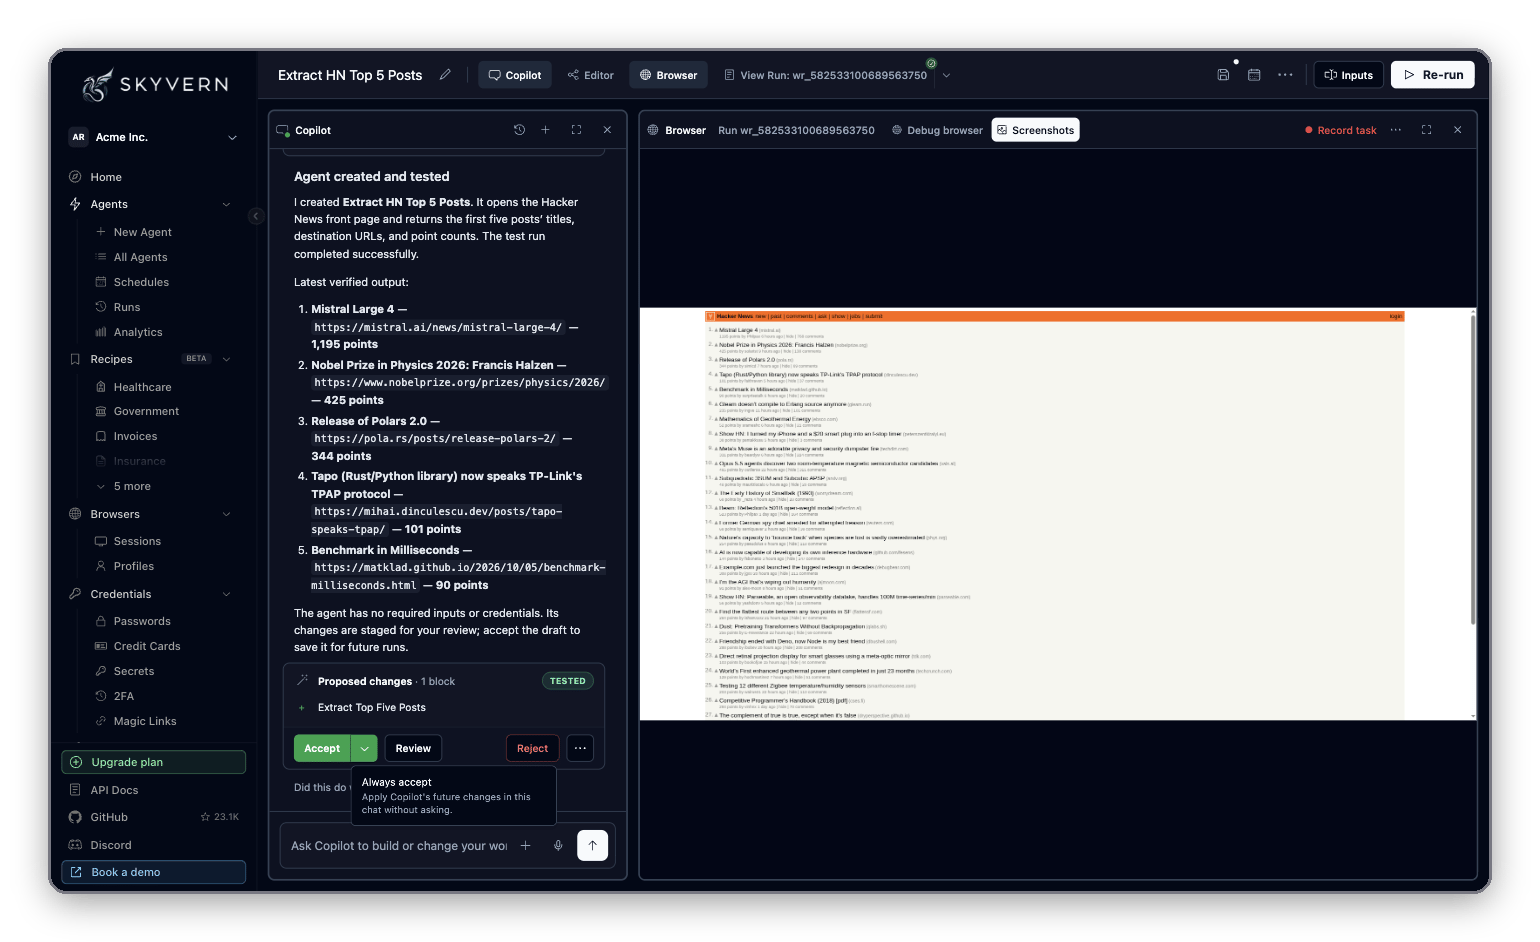
Type what you want in the Copilot message box (“Ask Copilot to build or change your workflow…”) and send. Copilot plans the steps, opens the site in the Browser pane, adds or edits blocks and runs them to test them. Every change Copilot makes arrives as a Proposed changes card:- The card lists each block Added, Changed or Removed, and shows Tested, Untested or Test failed.
- Accept applies the changes and saves them to the agent.
- Review compares the proposed agent with the previous version before you decide.
- Reject discards them and puts the agent back to the previous version.
- Always accept (the arrow next to Accept) applies Copilot’s future changes in this chat without asking. Turn it off with Turn off next to Auto-accepting.
- Test end-to-end runs all the blocks together on the real site.
- Attach files with the + button in the message box, or attach a PDF procedure (an SOP) for Copilot to turn into blocks.
- Answer questions. When Copilot asks one, pick an answer or type your own.
- Give it a login. When a site needs an account, the Copilot needs to sign in card lets you pick from Saved logins. See Credentials and 2FA.
- Start over or go back. New chat starts a fresh conversation. History reopens earlier chats on this agent.
Edit blocks by hand
Open the Editor pane. Blocks run top to bottom in the order shown.Add a block
1
Open the add menu
Hover over the + on the line between two blocks (or under Start on a new agent).
2
Choose Add Block
The menu offers Add Block, Record Task (do the steps yourself in a live browser and turn them into blocks) and Upload SOP (generate blocks from a PDF procedure).
3
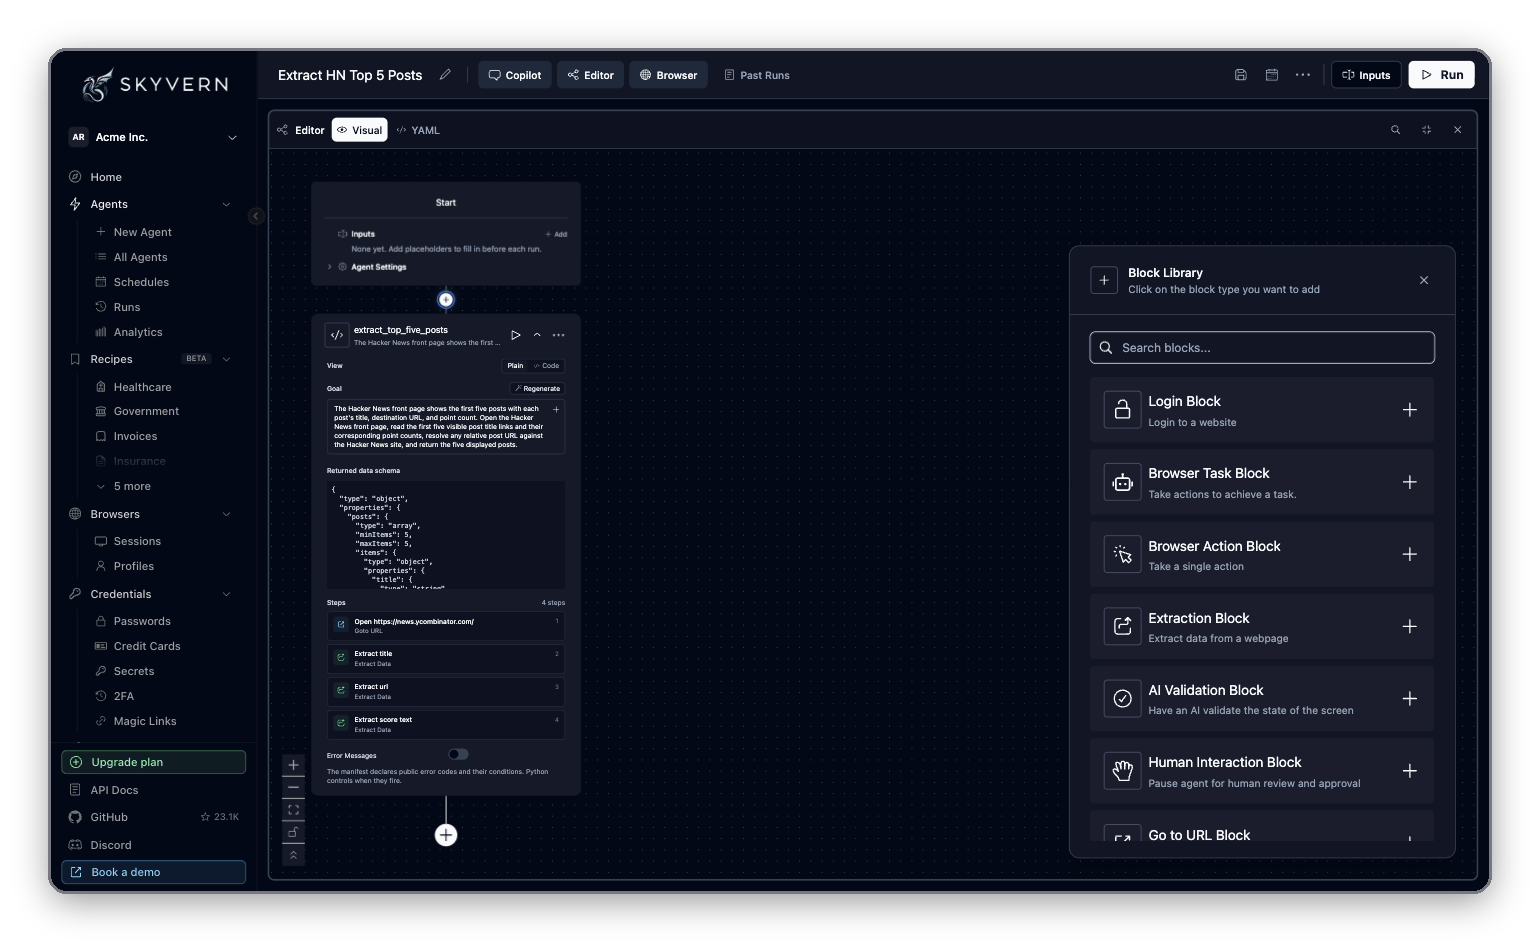
Pick a block
The block library lists every block. Type in Search blocks… to filter, then click a block to insert it.
Configure a block
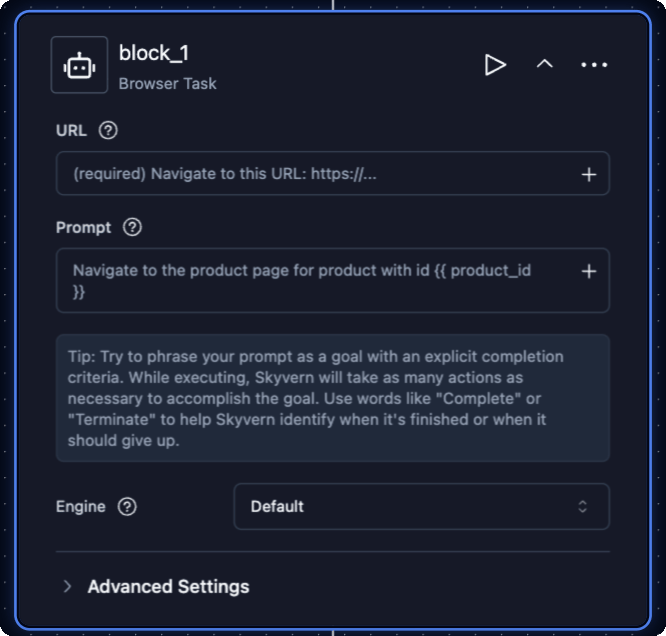
Click a block to open its settings in the block config sidebar. Every block has a Label. The label also names the block’s output, which later blocks read as{{ <label>_output }}.
Click Start at the top of the flow to open Agent Settings, the settings that apply to the whole agent. They include Webhook Callback URL, Proxy Location, Run With, Prevent Overlapping Runs and Max Run Time (minutes). The run form can override some of them per run.
Block actions
- Run this block (the play button on a block) runs just that block in the Browser pane, which is useful for testing one step.
- The ⋯ menu on a block (Block Actions) duplicates or deletes it.
- Search blocks (magnifier in the Editor pane header) jumps to a block by name in a long flow.
Visual and YAML
The Editor pane header switches between Visual (the flow) and YAML (the full agent definition as text). Edits in either view apply to the same agent. YAML is the quickest way to copy an agent’s structure or make many edits at once.Choose an engine per block
Browser blocks have an Engine setting:
Leave Default unless a block needs a specific engine. Concepts explains the differences.
Inputs
Inputs are the values that change from run to run: a search term, an account number, a file. Define them once and reference them in any block.1
Open Inputs
Click Inputs in the top bar. A badge on the button shows how many the agent has.
2
Add an input
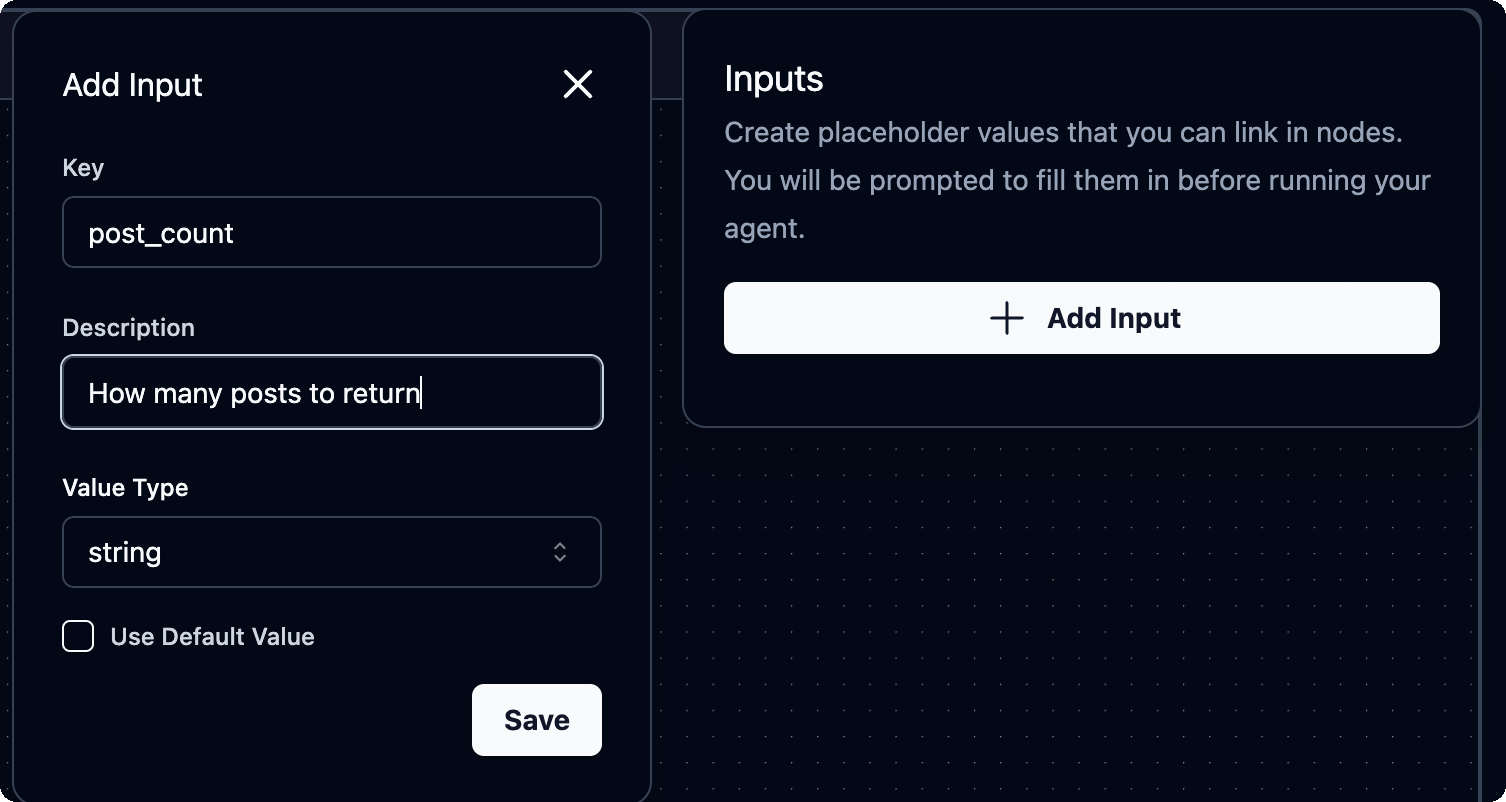
Click Add Input. Enter a Key (the name you reference it by), an optional Description, and a Value Type.
3
Set a default (optional)
Turn on Use Default Value to prefill the run form and schedules.
4
Save
Click Save, then save the agent.
Credential inputs
Choose the credential value type to pass a login or secret without putting it in the agent.- Pick a Credential Type: Password, Secret or Credit Card.
- Pick a Source: Skyvern (credentials saved in the app), Bitwarden, 1Password, Azure Key Vault, or Custom Credential Service if your organization set one up. Not every source supports every type.
- Choose the credential, or fill in the vault details the source asks for.
Values every agent has
These names are built in, so you can’t use them as input keys:Save and versions
Copilot’s changes are saved when you accept them. Your own edits in the Editor or YAML are saved when you click the save icon. A Saving Changes dialog lists what will change before it saves. Each save creates a new version. Open More actions → Version history to see them in the Agent History panel. Select two versions and click Visual Compare to see what changed.Save as Template
More actions → Save as Template adds the agent to your organization’s templates. Anyone in your organization can then start a copy from All Agents → Create → From Template. Template agents show a bookmark icon in the agents list. Remove from Templates undoes it.Organize agents
Agents → All Agents lists every agent in your organization, with Title, Folder, Created At and Actions columns (some organizations also see Created By).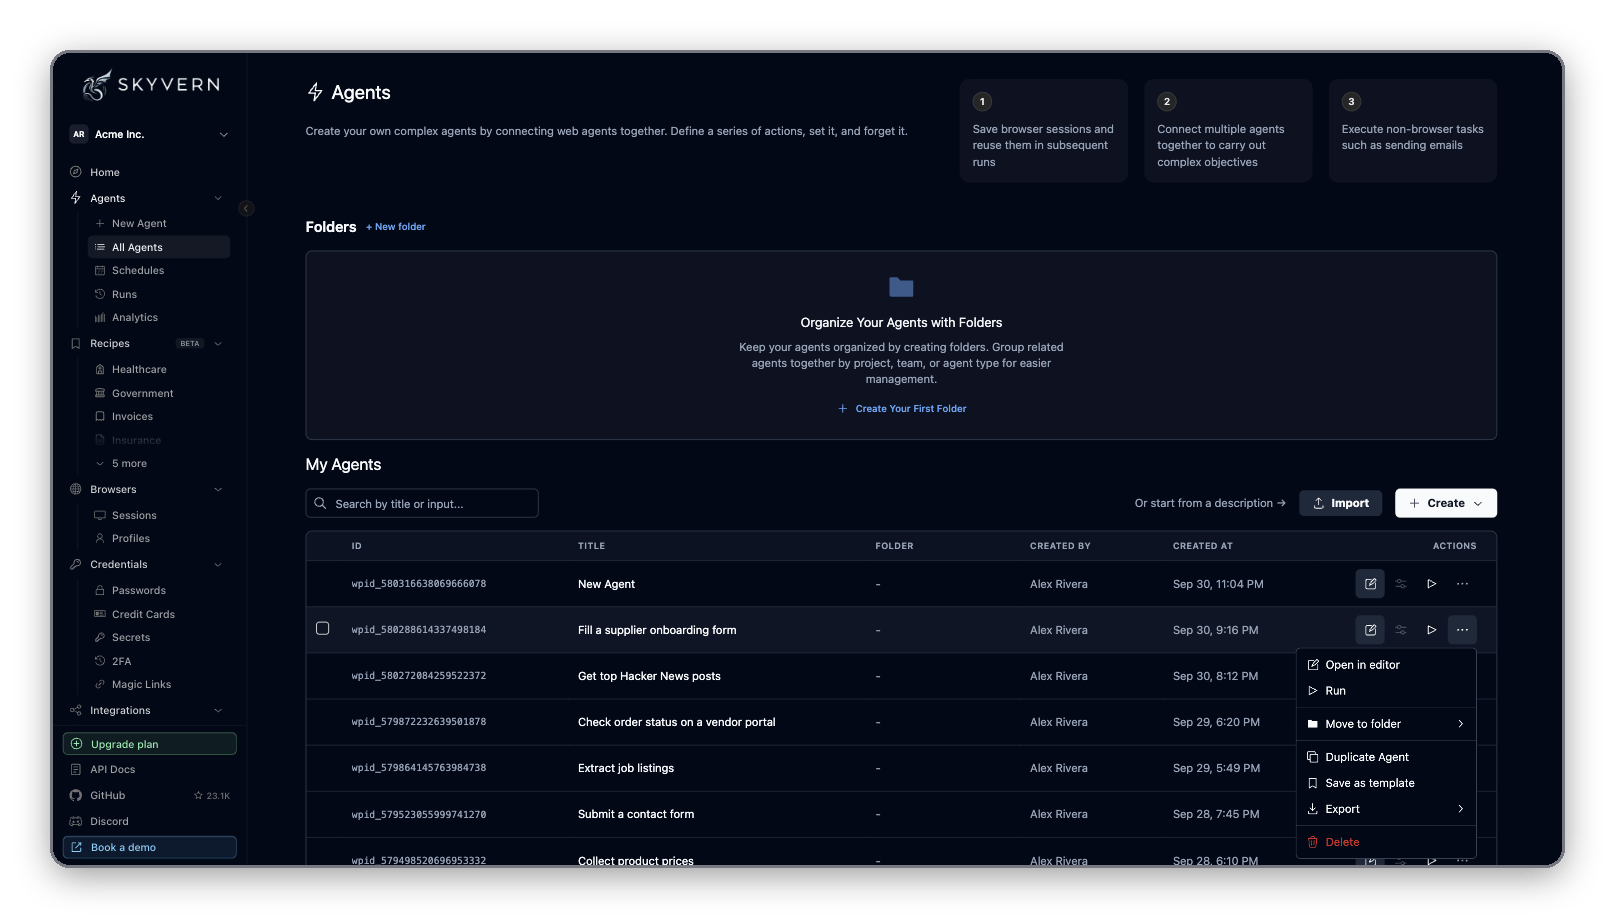
- Create → Blank Agent or From Template starts a new agent. Or start from a description → goes to Home and Copilot.
- Folders: click + New folder to create one, and click a folder card to show only its agents. Each agent’s row shows its folder.
- Search by title or input… filters the list.
- Row buttons open the agent in Studio (Open in Editor) or start a run (Create New Run).
Import uploads one or more agents from
.yaml, .yml, .json or .zip files. A .pdf procedure (SOP) is turned into a new agent.
Next
- Runs and schedules: run settings, live control, run history and schedules.
- Blocks reference: every block and its fields.
- Credentials and 2FA: logins, secrets and 2FA codes for your agents.